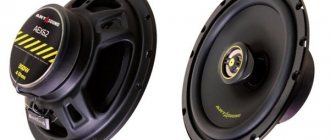
Speakers RADIOTEHNIKA S-30 from old to new
Hello, my name is Artem Denisov.
I'm a programmer, I'm interested in electronics and all sorts of interesting things. I’ve been reading habrahabr for many years, and now I’ve decided to write an article myself. This story began in an old, dark and scary basement. In which I discovered ancient Soviet speakers RADIOTEHNKIKA S-30. Which I inherited from my grandfather.
It was a shame to throw them away, so I decided to restore them. Make it possible to listen to music from your phone, etc. etc. Anyone interested, welcome to cat.
ATTENTION!!! Lots of photos and videos. “Drilling the earth for oil? Do you mean you have to drill into the ground to find oil? You are crazy!" A response to a design by Edwin Drake, the creator of modern oil production, 1859.
Many will say: “Why bother with this nonsense? You can just buy a new speaker.” Indeed, perhaps this scenario will be preferable for the majority. However, if you still decide, an amazing opportunity will open before you to make exactly the kind of piece of iron that your soul and heart requires.
So, let's go.
1 - disassembly
Of the two columns, only one turned out to be working. And this is what she looked like.
You will not believe. The capacitors on the crossover (frequency divider) retained their capacity. But these speakers are over 30 years old. Honestly! I desoldered and checked.
2 - design
Everything has been taken apart.
The speakers were successfully removed. The crossover, surprisingly, was still alive. What to do next? Benjamin Franklin said: “The best investment is an investment in knowledge.” Therefore, it was necessary to visit the library and make a couple of good investments.
It turns out that calculating the acoustic system correctly is not at all so easy. Therefore, it was decided to create a new one, with minimal deviations from the old one.
And keep the design option for the acoustic system with a bass inverter in the form of a pipe.
3 - spare parts
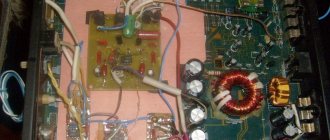
An amplifier must be built into the speaker. There are many different boards and options. You can buy an amplifier, Bluetooth module, power supply, etc. separately. etc. However, I decided to use a ready-made solution. My choice fell on the next amplifier.
This thing immediately solves many problems. It contains a bluetooth module and supports the ability to listen to music from a flash drive or from a TV. And it has a universal power supply of 110/220 volts. And it even includes a remote control included.
And to make life fun and joyful, I also ordered a beautiful retro sound level indicator.
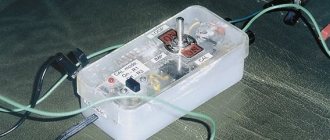
And a red glowing power button.
Well, I managed to buy a couple of pieces of wood inexpensively at a local store
4 - assembly
I assume that you are already tired of reading texts and looking at pictures.
Therefore, I invite you to watch a video about how the speaker manufacturing process took place. As they say, it is better to see once than to hear a hundred times. If you have any questions, I will be glad to answer. I wish you a successful day, brilliant ideas, and always only good music!
Modification of the Radiotehnika S-30 speaker (10AC-222)
I am a big fan of Soviet acoustics, amplifiers and generally everything related to sound. The background to this article is this: one day I saw a Raiotehnika S-30 speaker in a friend’s garage. True - one. The second one was somewhere in his car at work. I took the first column right away. The second one was brought to me a couple of weeks later. The first column was in more or less normal condition. The one that rode in the car was much worse: a scratched and battered body, bent protective nets, a scratched front panel. Immediately after I had the speakers at home, I decided to modify them.
Main technical characteristics:
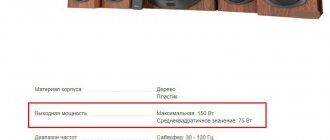
Nameplate electrical power no less than 30 W Nominal electric power 10 W Nominal electrical resistance 4 Ohm Nominal average sound pressure in the frequency range from 100 to 4000 Hz 1.2 Pa Reproducible frequency range no more than 50-18000 Hz Dimensions of speakers 364x214x195 mm Weight of speakers no more than 6 kg.
Later, the following stages of working with acoustics were determined:
- Complete disassembly of the speakers.
- Improved appearance.
- Sound improvement.
- Final assembly of the speakers.
The first thing I did was completely disassemble the speakers: I removed the front panel with the grilles, removed the speakers, bass reflex, filter, and pulled out the sound absorber. Only empty buildings remained.
Next, remove all the sealant, which has probably already dried from time to time. After this, we glue the housing in the middle along the seams with PVA wood glue or silicone sealant. As a last resort, you can use regular stationery PVA glue.
This is the longest procedure, since it takes about a day to dry one seam. After we glue all the seams inside, carefully sand the outside of the housings for further putty.
After sanding, we wipe the speaker housings from dust and putty all the defects. I used acrylic wood putty.
It is better to putty the columns several times to improve their appearance. But this depends on the condition of the buildings themselves. After puttying, do not forget to sand the bodies again with fine-grained sandpaper.
We cover the inside of the case with padding polyester or felt. If there is neither one nor the other, we use ordinary foam rubber. The sound absorber improves the sound quality of the acoustics.
After this, we cover the speaker housings with self-adhesive film. We select the color according to our taste. I chose the film as dark as possible, but when I brought it home, I saw that it was much lighter than I wanted. But it's not scary. I took a film 45 cm wide. By cutting it into two parts lengthwise, you can paste over two buildings at once. The width of the film is enough for wrapping on the front and back of the column.
At this point, the housings themselves can be considered completely finished. Let's move on to the front panels. I painted the front panels and grilles with matte black paint.
We carefully sand the protective grilles, otherwise the paint will not adhere well and will peel off over time. We do not sand the front panels so as not to spoil their texture. I covered the nameplates with the frequency response with masking tape so as not to paint them over. It is better to paint in 2-3 layers.
Now let's move on to speakers and filters. We replace the wires in the filters with acoustic ones. I took an acoustic cable with a cross section of 1.5 mm2. But for such speakers, a cable with a cross-section of 1 mm2 is quite enough. If there is no speaker cable, you can use a regular copper cable with PVC insulation. We throw out the terminals on the filter board for connecting the speakers! We solder all the wires to the board! Some craftsmen, when working with filters, remove the overload indicator, as it degrades the sound quality. But this is a purely subjective opinion. Personally, I didn’t notice a difference, I just turned the sensitivity to maximum and installed green 5 mm LEDs. It turned out a la “color music”. LEDs blink in time with low frequencies. The overload indicator electrolytes passed capacity tests, so I did not replace them. I replaced the standard terminals with acoustic ones.
We paint the low-frequency speakers with office ink.
My phase converters (FI) were completely dry and crumbled. So I bought a sewer pipe with a diameter of 32 mm. It fits FI size perfectly. We cut two pieces of pipe and glue them to the front panel with super glue. To cover the large hole in the speaker housing, I used a piece of old FI.
After all the operations have been completed, we begin assembling the speakers. Apply sealant in the areas around the speakers. I used the first thing that came to hand - black silicone sealant.
We put the speakers in place and solder the wires to them.
If desired, we put grilles on the speakers. You don’t have to install them, but I have curious individuals who like to rub their hands on the vibrating speaker :)
We put the front panels in place and fasten them with new screws. To prevent them from standing out too much, I painted the screw heads with the same paint as the front panels.
As a result, this is what I got.
They play from the Radiotehnika U-7111 amplifier along with the Radiotehnika S-50B acoustics. I connected the speakers with the same speaker cable as in the filters. I like the fact that the amplifier allows you to connect two pairs of speakers.
OK it's all over Now. I look forward to your criticism, advice, and suggestions. Sincerely, resident of the Soldering Iron forum - KVLADS
Is bass possible from a speaker with a small diameter?
Well, what can I say... there are 3 points...
The first thing regarding the speaker itself is that the bass response is the product of the speaker area and the amplitude... by decreasing one and increasing the other, you can correct something... however, the question of mass inertia and the width of wave propagation will come up... i.e. essentially distortion and attenuation characteristics as the listener moves away from the structure...
2nd moment, the speaker, when open, will reproduce little bass for the most part... acoustic closure of the front and rear waves... although there are exceptions... with a large diameter diffuser, for example, this problem is not so relevant... but in most cases there is a housing that separates the waves...
there are different cases... there is a closed box of an insulating type (ideally an adjacent well-damped room in which the back wave is completely absorbed)
There are resonant-type VZs (closed speakers that we are used to... the idea is to choose a size when the wave projected from the back wall of the housing, being not completely suppressed, still arrives in the phase of the next oscillation to the diffuser and thereby does not interfere with the operation of the speaker)
there is a bass reflex (the most popular type of speakers with the most rational compromise in all system parameters, both in terms of distortion, size and power... it is more correct to call it a second-order band pass)
There are various games with fi type tornado focused on the dimensional increase in the spread of the back wave in order to form a spatial illusion of a large diameter speaker. There are also some dimensional games with waves such as the technology used by the Chario brand...
There is a labyrinth system whose optimization is fi...
well, actually a band of bass of various orders, the idea of which is to forget about the phase and time components of the signal but to create a standing wave that will buzz quite well, producing from a small-volume case such a not weak bass, albeit terribly distorted...
3rd moment the reaction of room resonances... if you find a place where the room resonates well and at the same time increasing the attack and the degree of damping of after-sounds and drive there, for example, a phi port or a bandpass port, then you can compensate (or even strengthen) the blockage in the attack of these systems and get such a response that is not weak in terms of bass... I have a personal attempt at installing computer bandpass 2.1 speakers in such a place and I must say on Face to the wind Frank Duvall was overwhelmed by this system like an adult... although the bass player in that sub is at most 10 cm...
correction for the above track... Frank Duvall is a great imitator of softrocker sound with electronic gadgets... hence the ideal bass sound on a terribly crooked solution... a full-fledged high-quality bass of an acoustic nature still requires a full-fledged large-sized one... small-sized high-quality solutions to preserve the usefulness of the sound require digital processing like mp3 compression for ejecting from the signal extra resonant and peak components that interfere with the operation of the speaker and prevent the subsequent propagation of waves in space... but as a result of this ejection, the usefulness of the bass sound will inevitably be impaired or its kicking effect in the rhythm-responsive organs of the body will be reduced... i.e. audiophiles will still identify the difference...
