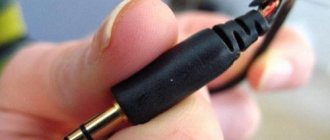
Holding a broken headphone plug and wondering where the end is? Did you take your headphones out of your tablet or smartphone too quickly to find out what was left a little behind?
Unfortunately, headphone jacks are not designed to be inserted and removed regularly and repeatedly. If part of your headphone jack is stuck in your phone, tablet, or even MP3 player, you'll need to remove it before you can use any replacement headphones.
These six methods should help you regain the lost part.
Use inside biro
Here's a fun fact: the pipe running up the inside of your bio (like a Bic or Paper Mate) is almost exactly the same diameter as the headphone jack. With a little force and adjustment, this can be used to remove a broken connector from your device.
To do this, remove the inner pipe. This is a piece with ink in it, and is almost always removed by pulling the pen nib. At the bottom of the tube, opposite the tip, you should find that there is no ink there. You can use this part of the tube to remove a broken plug. Simply insert it firmly into the headphone jack and remove. The tube should grab the broken part and pull it out.
If this doesn't work the first time, you have a few options. First, slightly widen the tube with a nail to ensure a tight seal against the plug. Alternatively, you can quickly heat the end of the tube to soften it and then insert it into the socket. Leave it for a moment, then walk away.
Also, if you have a very steady hand, try hot glue or super glue in a very small amount on the end of the tube before inserting. The video above demonstrates a similar approach using chewing gum.
Finally, you can skip some pressure. If you can, cut a tube two inches long (or find something similar in size, such as tubing from a can of lubricating oil), then insert it into the headphone jack. Then tap it with something hard (like a shoe or shoe) to make sure the missing part is pinched. When you're happy that the handset is holding it, remove it from the phone.
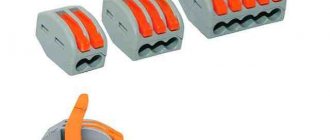
Deciding which wires to twist
There are clearly more wires in the headset than three - there are five of them. Two wires are for the microphone, and three for the headphones. A frayed gold wire (ground) was wound over a thin white wire - a microphone one.
Now we are faced with an impossible task - twisting the necessary wires together . actually simple ! Three AUX - wiring to three headphone wires. In this case, it turned out that the colors of the internal wiring coincided and by twisting the same colors the headphones started working.
For information on how to determine the colors of the required wires, read the article:
Repairing the headset jack or five wires on four contacts
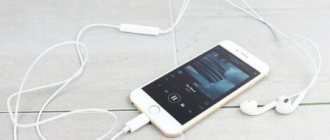
You can also use this simplest method: we plug our connector into any audio device that is at hand. The cassette player was closest to everyone.
Superglue the other end of the fork
If a pen cartridge doesn't work or you prefer a different approach, then superglue may be the answer. You probably know that when using superglue, never bond two surfaces immediately after application. Instead, you wait until they dry out a little and become sticky. This stickiness is the key to removing the broken part in this scenario.
Using a cocktail stick or other narrow applicator, place a tiny bead of superglue on the remaining end of the headphone jack. This is a piece that didn't break in the phone! Wait (according to the package instructions) for it to become sticky, then insert it into the slot. After pressing for about 30 seconds, pull. If the broken component is attached, you have solved the problem.
Although a small amount of adhesive should be used to avoid leaving residue inside the socket, it can be removed. Simply apply some rubbing alcohol to the Q-tip and give the inside a quick clean.
Break at the plug
If the headphones are inexpensive, then the jack (connector) will not be very secure. They are mainly produced in 2 types.
You will get 2.5″ or 3.5″. It cannot be said that one is more reliable than the other. Both can break at one time or another.
To fix the problem, you will need to read the theory and start practicing. This will take about 20 minutes. Let's look at how the plug is designed and the purpose of its wires hidden in the cord:
- one channel right;
- second channel left;
- general channel.
In the wire you will find 3 wires, each of which comes from these channels.
Thumbtack or pin
If you want a simpler approach, you can use a thumbtack or thumbtack. This requires the point to have a slight bend in it, so you may need to take a hammer and give it a few quick blows. You should end up with an "L" shape at the point of the pushpin or pin.
Holding the device in one hand, take the thumbtack and insert it into the headphone jack. Do this so that the tip of the pushpin touches the plastic part of the connector, then push it down and twist it at the same time. The curved point should be slightly buried in the cork. If you are sure that you have enough purchases, remove the junk from your phone.
Repair of headphones with headband and microphone Genius
Genius headphones were repaired because the wires were frayed and the phone mounts to the headband were broken.
The headphones were brought to me for spare parts, but after assessing their technical condition, I came to the conclusion that they could be repaired.
Repair of headphone-to-headband attachment
Before repairing the frayed wires, it was first necessary to repair the mechanical damage to the attachment points of the headphones to the headband.
An opening of the components showed that the protrusions used to fix the flat spring of the headband were missing. It looks like the headphones were dropped and the flat spring simply cut them off.
It was possible to secure the spring in the assembly using two screws, but for reliability I decided to use a combined type of fastening - one screw and hot-melt adhesive. To do this, first a hole was drilled in one of the halves and an M3 screw was inserted into it.
Next, the pieces of hot-melt glue were melted with an electric soldering iron, and while the glue was still hot and hardened, the headband spring was installed and the nut was screwed onto the screw. The second unit was repaired in the same way.
The thickness of the plastic of the assembly allowed the use of a screw with a conical head, which was fused into the drilled hole using a soldering iron. If desired, the screw head can be coated with black varnish.
As you can see in the photo, the appearance of the headphones has not changed. The ability to adjust the length of the headband remains. Now the headphones are securely attached to the headband, and you can begin repairing the cord.
Headphone cable repair
The multimeter did not dial through the headphones through the jack, so I had to disassemble the phones. Disassembly begins with removing the ear pads from the phones.
To do this, grab the edge of the ear pad and pull it back with your hand. Next, pry up the ear pad using a screwdriver and carefully remove it from engagement with the headphone body in a circle.
To disassemble the earphone, just unscrew three screws and the cover will come off. But one of the screws rotated, but did not come out.
It turned out that one of the threaded posts had broken off. I had to use hot glue to install a metal stand with internal threads instead.
A volume control and microphone mute control unit is installed on the headphone wire. To determine with a multimeter where the wires were broken, we had to disassemble the unit. To do this, it was enough to unscrew two self-tapping screws.
A test with a multimeter showed that the speakers in the headphones were working properly and had a resistance of 31 ohms. And the wires in the cord had a break both in the jack section - the volume control, and from the volume control to the headphones. I had to cut off a section of the cord, both at the headphone and on both sides of the volume control, and resolder the wires.
The movement of the cord in the headphone body was limited by tying it in a knot. This is a bad option because the cord has the ability to move inward and rotate, which could result in the wires breaking.
Therefore, the cord was secured with hot glue. First, glue was applied to the cord, which was pulled into the sleeve until the glue hardened. Then the cord was fixed to the earphone cover with hot glue.
All that remains is to solder the wires according to the color markings, twist the earphone halves and put on the ear pad.
Now it's time to repair the sound control unit and turn off the microphone. In this model of headphones, to open the unit, it was enough to unscrew two screws.
The cords in the block were fixed using plastic bushings, which could not be removed from the cord. Therefore, the bushings were cut lengthwise with a knife.
Next, sections of the cord were cut off and the insulation was removed using a soldering iron. It is worth noting that the wires through which the sound signal was supplied to the headphones and the microphone were, to reduce mutual influence, isolated from each other.
To fix the sleeve on the cord, a drop of hot-melt adhesive was applied to it; you can also apply instant glue. But hot melt glue hardens faster.
Next, until the hot-melt glue hardened, the sleeve was pushed onto the hot-melt glue and compressed using a wrap of thread.
All that remains is to solder the wires to the contact tracks of the printed circuit board and assemble the adjustment unit. To make it easier to solder, I pressed the board with pliers. At the same time, the volume control was also lubricated with machine oil.
Do-it-yourself repair of Genius headphones with a microphone is completed. The check showed their proper operation. Now the headset, if handled carefully, will last for many years.
Toothpick and hot glue
Looking for some other object that is small enough to fit into your phone's headphone jack?
Try a toothpick; plastic or wood is either ok. Just make sure it's narrow and long enough to reach the jack and connect to the missing piece of headphone plug. Then apply a small amount of hot glue to the end and wait for it to cool slightly.
Gently insert into the headphone jack and make contact with debris. Wait for the glue to cool and dry, then remove. If everything went according to plan, the missing piece will be removed!
Most common color
- earth (common) – yellow (gold)
- left - blue (green)
- right - red
Like any rule, this one also has exceptions, especially when it comes to headsets. For example, it happens that the right one is green, the left one is blue, and the red one is a microphone. Sometimes the wires are not completely the same color, but have stripes of color combined with yellow.
But pure YELLOW is always EARTH. Mixtures of colors with yellow, in most cases also earth, but you need to check.
Therefore, the first thing we do is twist the yellow wires of the headphones and the AUX cable together.
Now we alternately twist the headphone wires with the AUX cable wires. The bottom line is that the red wire of the AUX cable connector needs to be twisted with the red wire of the headphones and then the right earphone will start singing.
Have you determined? Great! Now the wiring that remains unclaimed can simply be cut off.
So, the wires are twisted, the headphones are singing - there’s a smile on your face)
Heated paper clip
No glue on your hand? Heat is a good replacement, since the broken part of the connector is almost always accompanied by a ring of plastic. To grab it, take a paperclip and twist it slightly, perhaps bending the main length 90 degrees.
Then, hold the paperclip with something heat-resistant and heat the end of the bent part. Holding the phone in your hand, carefully insert the heated paper clip into the socket, in the middle. Press down firmly and wait a few minutes for the plastic to cool. If everything went well, you should soon be able to remove the broken piece of the headphone jack.
Add thickness
Add thickness
In order for the ear pads to be thick, we will need to cut another strip, the width of which will determine the future thickness. Just as before, leave 2-3 mm for the seam.
From the recommendations, I chose a thickness of about a centimeter, the remaining half a centimeter was left for the seams.
The length of the strip was cut with a margin, by eye. For a more accurate calculation, you should pick up a calculator and remember your school years, in particular what
For a radius of 37.5 it turned out to be about 23.5 cm. So we cut out 25 cm and don’t worry.
Sew the edge of the strip to the edge of one of the rings.
When the circle is completed, leave an overlap of 0.5-1 cm and cut off the excess part of the strip. This is what it looks like after stitching on a sewing machine.
Buy GripStick
If DIY fixes don't work for you, it may be time to consider a professional solution. The GripStick is the result of a successful Kickstarter campaign, designed specifically for removing damaged headphone plugs.
The GripStick can be purchased online from the manufacturer's website nightek.com for $24.95. Although this is expensive, it is much less than paying a professional to remove a lost headphone jack. Likewise, if your phone is under warranty or on a smartphone, it may be inconvenient to send it in for repair (this usually is the case). Purchasing a GripStick will avoid this problem.
Using GripStick is easy. Insert the cylinder into the headphone jack, push it into place and pull it out again using the ring. The lost piece will be held by the GripStick and your headphone jack will be free to use again!
How to fix headphones yourself: detailed instructions
- Cut the cable where the wire breaks.
- Put on the heat shrink tubing (if you have one, if not, skip this step).
- Carefully remove the braid from the cable with a knife. Do not damage the wires!
- Clean off the varnish (using a knife or lighter) and tin the wires using a soldering iron (if you will be soldering wires).
- Solder the broken wires (or use the solderless method from this article). Just don’t confuse which wire should be soldered to which!
- Check the headphones for functionality.
- Drag the heat shrink tube to the soldering area, heat it with a hairdryer or lighter until it shrinks to the shape of the wire. If you don't have heat shrink tubing, carefully insulate the wire with several layers of electrical tape.
Can't delete it? Check your volume
If for some reason you can't remove the broken headphone plug from your device, don't panic. Your device's volume may still be working, so find out. Play some audio; if the device's speaker is still working, then you may want to consider another solution.
No sound? This is because a broken plug tells your device that it is connected. As for your phone or tablet, it sends audio to your headphones. You will remain silent (upset by phone calls) until you are able to remove the offending object.
Repair of Panasonic RP-WF83 wireless headphones
I had to repair Panasonic RP-WF83 wireless headphones, which worked fine, but the batteries located in the headphone from the base did not charge.
We had to take them out and charge them from a separate charger, which created inconvenience.
In one of the recesses of the base with the transmitter there were two spring-loaded contacts, through which the charge current was transmitted to one of the headphones. Measuring the voltage on these contacts with a multimeter turned on in constant voltage measurement mode showed that the charger circuit in the base is working.
Therefore, the fault is in the earphone itself. To get to the electronics, you need to remove the ear pad and unscrew the screws, as described in the article above. Upon inspection of the board, the reason for the failure immediately became clear.
The printed traces to which the contacts were soldered to connect to the base were torn off from the board. Considering that only the pressure of the moving contacts of the base was applied to them, the failure occurred due to a design flaw. The contacts were sealed in such a way that when pressure was applied to them, the force was transferred to tearing off the tracks.
The torn off printed pads were glued to the board with Super-Moment glue. Next, as shown in the photo, they are covered with a layer of solder.
Two thrust angles were made from a brass plate, tinned with solder and soldered on the inside of the contacts. The corners can be made from any metal, iron is also suitable, the main thing is that the metal is tinned with solder.
Now all the pressure will be applied not to the place where the contacts are soldered to the printed circuit board, but to the installed corners.
The cracked tracks were simply tinned and covered with a thick layer of solder. If the track is badly damaged, you can duplicate it with copper wiring.
To check the charging of the batteries, wires were connected to the contacts and connected to a voltmeter, which showed a voltage of 2.61 V. This indicated that the batteries were charging, since their operating voltage cannot exceed 2.5 V.
The practice of using the headphones has shown a stable battery charge. Do-it-yourself repair of wireless headphones is completed and now they will never again fail to work due to broken contacts.
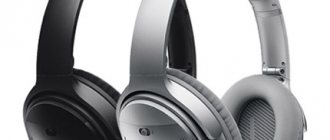
Maybe it's time to switch to Bluetooth
It may be inconvenient and may require you to rethink your audio settings, but switching to Bluetooth is the best way to avoid broken headphone jacks in the future.
Personally, I've found that cheaper headphones are likely to have poorly made plugs. This comes with a double hazard: the plug may break, but it may also damage the socket. This can happen in standard use if the connector is cheaply made, resulting in frustration and disappointment.
While you could use one of the fixes above, purchasing Bluetooth headphones is the best option. Help is needed? Check out our Bluetooth headphones buying guide. Guide for
If your phone is damaged in other ways, check out how to recover data if your phone has a cracked screen.
Now let's remove the rubber braid
Especially for this article, the dumbest knife was found in order to try everything for myself).
It is most convenient to cut the braid exactly as in the photo. You don't need to press the blade too hard. Thanks to bending, the braid itself will diverge. We turn the wire, making cuts and, when we have gone through the circle, remove the braid. The main thing is not to cut through the wiring.
It’s better to expose about 2 centimeters of the wiring, it will be easier and the contact area will be larger. Which will increase reliability. The wiring is covered with varnish that needs to be cleaned off. First there was an attempt to clean the varnish with a knife.
Read also: Mit 4v precious metals content
Not the best way. The wires are very thin and with such rough mechanical action they come off along with the varnish. The dullness of the knife contributes well to this. In principle, this can be done easily with a sharp knife. But we don’t have a sharp knife, so we’ll use a lighter. Well, or at least matches.